Project Little Devil Page 5
Project Summary:
Having owned almost a dozen shuttles including the very first model, I’ve always been a fan of them, but I’ve never really done a full blown mod project based around one. This project will change that, having sourced a bare g2 style case I have set to work creating something that is a class above the normal shuttle.
Previous page | Next page
Page 1 | Page 2 | Page 3 | Page 4 | Page 5
Project Little Devil: Woooot parcel not lost
2004-12-21
Well things just got wierd!
Had a knock at the door earlier and I assumed it was the courier coming to deliver my bits ordered for my new project. It was a courier box he was carrying a box I recognised!
And lo it was the box I sent off to the USA many moons ago, the reason its been returned was stated as ” Not deliverable as addressed, Unable to forward”
God knows what happened I will have to speak to the people at the other end and double check the address.
At least I dont have to redo everything!
Project Little Devil: (Major Update)
2005-04-25
Ok its time for a major update after the long delays, I’m hideously over my hosting limit by 2gig whoops but what the hey hehe.
I’ve got back to work on this project over the last week spray painting certain parts of the project, I had originally intended to get the parts airbrushed in the USA at smooth creations but after a long round trip the parts ended up back in the uk without any paint one them. I could face resending them so decided to do the painting myself and to not do the airbrushing that I originally intended.
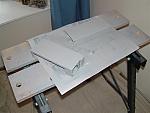
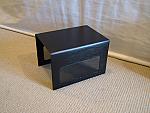
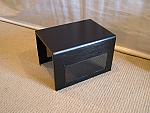
First to get the painting was the case cover, its had 3 coats of primer and 3 of black, its not finished yet but here are the pics of it being modded. I’m not 100% sure how and what I’m going to do with it after the black. I’ve a few ideas that myself and my girlfriend are going to have a ideas session with to see what would look best
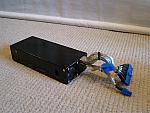
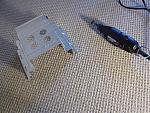
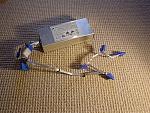
While I was looking at the psu I decided it was quite scratched from being moved so much and painting it black would be a good idea. So I took the electrics out of the casing and gave the casing the same treatment as the case cover. Its come out quiet nicely.
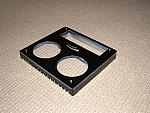
Next on the list of jobs was to spray the front panels, this took a fair while as it had three seperate parts to paint.
I then set about attaching the front panels into place.
I then put the drive cover/lcd holder in place to see how it would look in the end.
I hope to finish the case cover over the next week when I make my mind up hehe. I’ve got to design and build the fan control/led circuit as the originals I wasn’t happy with. I have a small aluminium box that will hold the circuits.
Quick update
2005-05-21
I’ve not had a chance to do much modding over the last few weeks and my new powerbook has taken up a lot of my playing time hehe. What I have done on the project has been a disaster.
First off I masked off the shell to do some colouring and when I pulled of the tape it took some of the black with it in certain places. I tried sanding down and starting again but I wasnt happy with the results and the same thing happened again 🙁
You can see the damage round the front in this image.
So I decided to cut my losses and get hold of a meshed cover instead as I have one on my main rig and they look excellent. It will show off more of the insides of the case as well.
It looks far better than painting would and matches the paint work on the rest of the outside. I’ve also redone the front pieces to get a better finish and to stop some of the chipping. I’m not happy with them yet so no pics but they are on the way to being done.
The plastic surround is another problem area I cant get it done to my satisfaction yet, and I may get a black surround if I can find one at a sensible price. That way there won’t be any chipping on that as it will get the most of the abuse when carrying it around.
Project Little Devil: Nearing Completion
2005-07-09
Ok I’m on the homeward leg now of this project. It should be up and running in the next couple of days and complete very soon.
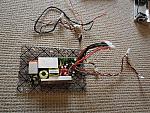
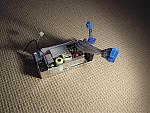
Since I last updated the log , I’ve redone the fan control and led power circuit board. I’ve made it into a single small board and mounted it into a small aluminium box. I’ve made up a wiring loom for all the power requirements. Its made in matching blue cable as used elsewhere in the mod. I seemed to have misplaced the pictures of these items I will add them later if I can find them.
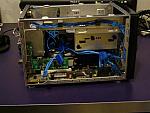
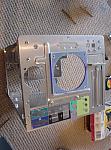
Over the last couple of days I’ve been gradually been building the machine back up. I’ve put the motherboard back in and fixed the controller circuit and cold cathode inverter into the spare hdd bay. I’ve reattached the modded power supply and attached the new wiring loom. I’ve fixed the rheostat into its position at the back of the case.
I’ve sleeved a new pair of 4in cathodes for the project to match the blue theme:
Here’s some pics of it being built up:
I will be transferring the components over from my main rig to complete the system, its going to be the following spec
Pentium 4 2.26ghz (To be replaced soon with a 3ghz chip)
2x 512mb Corsair XMS PC3200 DDR RAM
200GB Seagate barracuda hdd
Sony DVD Writer (SATA connected via convertor board)
Sapphire X800 XT Graphics Card
Shuttle SB61G2 motherboard with a zalman northbridge heatsink
It’s replacing my current AMD 64 rig so needs to be fairly quick.
Project Little Devil: Nearing the end
2005-08-17
Oh what a nightmare the last two days have been and its too hot for stress, its about 35degrees in my home office thanks to all the pcs. Little devil has been raising the temperature through other means though.
I will start with the good news; which is I’m using Little Devil to type this post so its now up and running. Its not complete yet, I need a new rheostat knob to match the black theme and the lcd isn’t in place yet due to problems I will describe below.
Onto the bad news; Getting Little Devil has been a complete nightmare, it took an entire day to get it up and running at the cost of one 200gb hard disc and the onboard sound it seems.
I started off by doing a test boot with just ram/cpu/mobo and it worked fine, I gradually built up to the full system and it just wouldnt boot up , I thought at first that it was a dead power swithc but it was my nice 200gb hard disc 🙁 Whenever it was plugged in the system wouldn’t boot. I replaced it temporarily with a 160gb drive from a client’s new server I was building and that sorted the problem with the system not booting but obviously I lost my hard disc. I’ve ordered another one now but it was a cost I could really have done without at the moment.
I then reinstalled windows to find that for some reason the working sound card onboard has stopped working, its fine in bios and in the control panel but won’t output any sound , I’ve tried lots of different drivers and checked all the settings but I’ve had no luck sorting it. I’ve therefore had to order a pci sound card to get sound which means the usb card I had in before will have to be removed. This leads to an issue with the cabling for the lcd, I was intending to use the internal usb port on the pci card but I can’t now. I will have to create a special cable instead. I’ve not had a chance to do that yet.
Another job yet to do is to mount the cathodes as I haven’t decided where they would best fit yet.
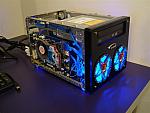
I took some pictures of the build and testing process along with some shots to give you an idea of the current setup. The blue front fans behind the grills are a great success as are the led feet, though for some reason the front right one is slightly dimmer for some reason.
Onto the pictures, first half build but powered up for the first time.
I then put the gfx and optical drives in, the wiring is a bit messy at the moment as I was just getting everything working first.
Then some other shots to give you a taster of the final look.
Project Little Devil: Complete
2005-08-19
Ok I’ve finally found time after finishing Project Mac Cube to finsh this project. There wasnt much left to do the main issue was the mounting of the lcd to the optical drive. I also had to replace the cpu and ram (God damn bf2 is resource hungry hehe).
I went from the following: Pentium 4 2.26ghz (Oc’d 2.54ghz), 2x 512mb Corsair XMS DDR, Seagate barracuda 250gb sata drive, Sony Dual Layer DVD Writer, ATI X800XT (oc’d beyond PE levels).
To the following: I went from the following: Pentium 4 3.0ghz (Oc’d 3.5ghz), 2x 1GB Corsair XMS DDR, Seagate barracuda 250gb sata drive, Sony Dual Layer DVD Writer, ATI X800XT (oc’d beyond PE levels).
All because I was getting bad issues in bf2 , curse EA !
Anyway back to the modding, the main thing that was holding me back installing the LCD was the cabling. I wanted to use an internal cable with nothing sticking out the back. I was going to use the existing internal matrix orbital cable but the back plate I was using to mount the lcd blocked me from doing this. So I bought an normal USB , and frankenstien’d them together to get the cable I wanted.
After making the cable up and doing the upgrade I set about installing the lcd drive. It wasnt as easy as I wanted , and I had to change the design of the back plate but once I had done that it was plain sailing. The cable is firm enough that when the drive returns it forces the cable back in the case. It works great and I’m very happy with it. I’d forgotten just how good the combination of a matrix orbital lcd and LCDC is!
I’ve taken some shots and a couple of video’s of the final finished project for you all to look at.
Videos : I took three vids for you to have a look at they are of the lcd in action along with the ejecting cd drive. The led fans at the front are dimmed slightly to allow clearer view of the lcd in the pictures (Its not a problem in real life just my camera.)
Previous page | Next page
Project Little Devil Page 4
Project Summary:
Having owned almost a dozen shuttles including the very first model, I’ve always been a fan of them, but I’ve never really done a full blown mod project based around one. This project will change that, having sourced a bare g2 style case I have set to work creating something that is a class above the normal shuttle.
Page 1 | Page 2 | Page 3 | Page 4 | Page 5
Project Little Devil: Fan control rheostat mounted
2004-08-08
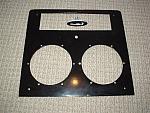
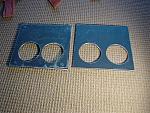
Well I’ve finished the little trick I had planned to cover the whole. What I did was to create two peices of perspex to allow me to mount and cover a rheostat which will control the two from fans.
The protective covers for the perspex are still in place but you should get the idea . The rheostat in the pics is dead as a dodo so I will be using a different one in the final setup. It will have blue wiring like all the other wires.
Two shots of the perspex:
Two shots of the perspex with the rheostat in place:
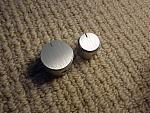
Three shots of the knob in place, I will probably use a black version of this knob in the final case though:
And a quick shot from the inside of the case:
Project Little Devil: Face plate mounted
2004-08-09
I’ve made some real progress today, first off my new rheostats arrived and I wired the single one up I require to control the front fans. The mounting is slightly larger than for the old one so I will have to re drill the mounting plate
After that I tried to mount up the fans onto the face plate and fix them into place. I quickly realised the fans hit the case in the bottom corners. I removed one of the mounting points on each fan and trimmed the chassis a bit more to make it fit. After that I thought about how to hold it all in place. I planned on using the existing screwing points but these were in some unknown imperial size. So I decided to drill through them and using a long bolt with a nut hidden behind. This meant I could do a proper test fit. Everything fits perfectly. These pics will give you an idea of the final look but there are some major changes to the look to come 😉
Some more pics with the cover on.
Project Little Devil: Face plate spray painting
2004-08-10
I’ve been working on the front panel today to get it ready for its trip 😉
The spare test face plate got a black spray paint job to see how it would look. Even with a quick and rough spray job it looks ace .
Back to the original faceplate , I’ve been working on the cd bay cover , I have more work on this still to do later
Project Little Devil: LCD mounting
2004-08-11
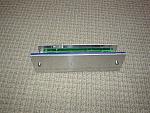
Another update, this time I’ve been working on the mounting for the LCD I am going to be using. It is made up of 3 plates , the first is the outer aluminium bay plate cover behind which is a perspex holder for the lcd itself. This means I only need to use two visible bolts in the whole lcd holder. The third plate is a back plate which will be bolted directly onto the drive itself.
The frontmost aluminium plate still needs to have its screen area cut out which will be one of my tasks for later.
First off heres some pictures of the plates being made
Here’s the final structure of the mounting bracket
Heres a quick shot to show you the scale of it when it is attached to the optical drive
And finally two shots comparing it to an official Matrix orbital bracket. The lcd in the bracket is an MX2 lcd which I will be using in the project , the other lcd is a none working one from another project. It just stops me from killing a perfectly good lcd.
Project Little Devil: Shuttle Logo Added
2004-08-12
Ok some more work on this project to give you lucky folks.
First off I had to cut out a slot for the lcd in the front bay plate.
After that I had played with the logo from a shuttle face plate , I cut off the end of a bolt and mounted the thread into a small hole in the back of the logo. I then glued it into place.
I did a test fit with my spare face plate and it works a treat.
I had a minor setup back on the face plate , the perspex piece has cracked near one of the holes for mounting my devil fan grills 🙁 However its not the end of the world and the solution is quite simple and would have been necessary anyway. More on that later.
Here is a quick final shot of the face plate with all its holes drilled.
Project Little Devil: A set back
2004-11-29
Hi All,
Its been a while since I did and update, there are a few reasons for this, firstly I’ve been snowed under with real life and work stuff so haven’t had a chance to do any modding. Add to this the fact I’ve lost my workshop area for a couple of months and I’ve only just got it back. As you can imagine I’ve been frustrated hehe.
Unfortunately there is only bad news to report on this project, Royal mail have lost several items that I have made so far including the shuttle case cover, aluminium faceplates and plastic face plate. These will have to be re-sourced and remade which is a real pain in the backside.
I’ve got to put a claim into royal mail for them but I doubt I will get all that they are worth and they say it will be a few months till I see a penny 🙁
While I’m waiting on this problem to be over come I will be working on a different project which I will post shortly…
Project Little Devil Page 3
Project Summary:
Having owned almost a dozen shuttles including the very first model, I’ve always been a fan of them, but I’ve never really done a full blown mod project based around one. This project will change that, having sourced a bare g2 style case I have set to work creating something that is a class above the normal shuttle.
Page 1 | Page 2 | Page 3 | Page 4 | Page 5
Project Liquid Bloo: Window modding
2004-05-15
I’ve had some time to do some more work on this mod, I’ve decided to make a few changes but that won’t happen for a bit , its due to a new feature I am adding to the front 😉
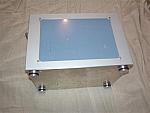
What I have done is cutout the window and cut the perspex to go into the window. It still has its protective sheet on but you get the idea. The perspex is held in place by four bolts which look quite nice.
As usual the pictures are clickable links to larger shots:
Project Liquid Bloo: Knobs and discs
2004-05-19
A quick update , I’ve not done a massive amount of work but I have sanded down some more of the discs. They are starting to look very nice indeed.
Also I received a new aluminium knob from maplins , the old one had a bit of glue on from a previous mod so i ordered a new one, maplins messed up and sent the wrong sized one to start off with , but they fixed the problem and sent out a new one telling me to keep the old one so thumbs up to maplins after sales support !
The piccies (Click on them for full sized shots):
Project Liquid Bloo: Custom Grills
2004-05-10
I’ve not updated this log in a while as I haven’t had the time to do anymore work on this log for a wee while.
What I have been doing is to plan exactly what I want to do and order some parts. One of the main changes from the stuff I’ve done to date is the whole theme of the mod, I have ditched the blue rings from the front and back of the case in favour of some much nicer looking rings 😉
I need to change the name of the project as liquid bloo is no longer suitable.
Onto the grills:
The piccies (Click on them for full sized shots):
The grills are stunning , the pics dont even do them justice they rock!
Big shout out to bonzo who made these up for me.
www.bonzai-mods.com
I intend to get a few major tools over the next day or two to allow me to finish this mod to the standard I am looking for.
Project Liquid Bloo: Discs work
2004-06-16
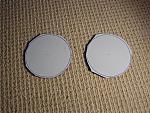
I’ve been redoing the aluminium and perspex discs that I did at the start of this project. I was never happy with the finish on them and with my new sander I was able to do a far better job.
They arent finished yet , I need to drill two holes for leds. I’ve been doing a test on a spare one I have made before to check it will look ok first. As you can see they are slightly different sizes , two of them will be for the back of the case and be smaller with the two bigger ones for the front.
Piccies
They are hard to photograph so the pics don’t do them justice.
Project Liquid Bloo: Aluminium Case feet
2004-06-20
I’ve done some more work today on the project , and I have some cash at long last so I’ve ordered a few bits and bobs for the project, they should come in the next few days.
Today what I’ve been doing is more on the case feet. I drilled two new holes to allow me to mount LED’s into the blue plexi. These leds will light up the feet and hopefully should should look ace.
First thing I did which took 20secs is to ripoff the old plastic feet and bin them.
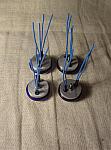
Then it was onto the feet, first thing I did was to countersink the main bolt hole so the screw will sit flush and so the case rests on the feet not the bolt. In the piccy the one on the right is the countersunk version
I then drilled two holes that go into the top disc (5mm dia) and into the blue plexi (3mm dia) . This allows the LED’s to pop out of the top of the disc and not short out on them.
I hooked up one of the led’s to my led tester cable to give you an idea of the final look will be like. Unfortunately my camera wont let me turn the flash off grrrrrrr so these pics are very hard to take , of the 20 I took these are the only vaguely usable ones. So my apologise for the quality.
I’m going to wire up the LED’s tonight which shouldn’t take too long , I’m not sure yet just how I will be powering them. I may make a circuit which controls them.
Hope you like the case feet so far 😉
Project Liquid Bloo: Aluminium Case feet fitting
2004-06-22
Today was supposed to be day of parts delivery but unfortunatly my door bell decided no it wasnt a good day for ringing so I missed the two couriers argggg!.
First off is a quick shot of the feet that have all now been drilled for the LED’s
I tried to do some more of the feet bits I have left which started off with me wiring up 8x 3mm Blue leds for the feet. I wanted to use my favourite silver wire but its too thick for the feet so I found some very thing blue wiring for the feet leds. I will wire the rest of the way to the led circuit with the silver wire.
Heres the LEDs with the feet
Next up was to drill the mounting points for the feet into the case chassis. I did a quick test fit of the feet to show you what they will look like. I also removed the remains of the sticker on the bottom of the case.
Thats all for today I need some more aluminium sheet to get any further and I’m waiting for my bulk order to arrive.
Project Liquid Bloo: Case feet Lighting
2004-07-22
I’ve been too busy for the last few weeks to work on this project or any of my other ones. I have now pretty much finished the other stuff so I can get back on with this project..
What I have done over the last few days is to look at the wiring for the case feet. I’ve rigged up 8 LED’s and made a small circuitboard to power them.
Click on the pictures for larger versions as normal:
The feet are hard to photograph due to the lights but you get the idea.
Project Liquid Bloo: Aluminium Case Feet Fitted
2004-07-25
Well I’ve spent the last few days , continuing with the work on the case feet.
I’ve finished the wiring and , glued the led’s into place. The led wiring required 2 extra holes for each foot, so I drilled the holes into the case bottom. I then installed them into the case and tested them out.
The look amazing in the flesh , but are a complete and utter nightmare to photograph so apologise for the quality of some of the pics. (Click on them for full sized shots)
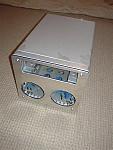
I took some shots with the case cover on to give you an idea of the final look.
Project Little Devil: Name Change
2004-08-01
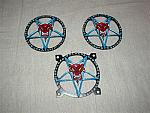
Ok first off a name , change as I’ve decided to go down a different route than I originally intend I feel the name no longer suits the project so from now on it will be called Project Little Devil. You’ve seen the grills so you get the idea 😉
Over the last few days I’ve mainly been killing leds on fans and doing some front panel modifications.
After that I built a fan control circuit which killed a couple of led fans in the process but I got it done in the end (new fans on order hehe)
Finally I took a few very dusty shots of the front panel in place to give you an idea of what the final layout will be
I hope to get a bit more done on this project this week.
Project Little Devil: Switches/LED’s fitted
2004-08-05
Some more parts have arrived to allow me to do some more on this project.
First off my replacement fans arrived to allow me to redo the fans. I’ve used the same blue wiring as the leds in feet as it matches.
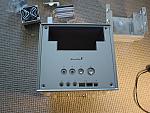
After that I attacked the switch setup. In the original case there was an optical in and out ports above the pci/agp slot , I don’t use these so removed them. This left me with 2 square holes and two small round holes. I needed somewhere to put the power/reset switches and pwr/hdd leds this was perfect. I got some cheap but nice square looking switches from maplins. The squares needed to be enlarged slightly but they fit perfectly into place.
Lastly I added the led’s in led holders in the two holes above the switches.
If you look in the second pic you can see a nasty looking hole where the hole for the inbuilt wireless ariel used to be . I was going to mount a bulgin led switch in there but decided it didn’t look right. I have a solution to the hole in progress 😉
Project Little Devil Page 2
Project Summary:
Having owned almost a dozen shuttles including the very first model, I’ve always been a fan of them, but I’ve never really done a full blown mod project based around one. This project will change that, having sourced a bare g2 style case I have set to work creating something that is a class above the normal shuttle.
Page 1 | Page 2 | Page 3 | Page 4 | Page 5
Project Liquid Bloo: No Going Back
2004-04-14
Another update from today.
I’ve gone well past the no turning back point on this case 😀 muhahaha
I’ve removed the front section of the case where the fans are going to go. I did this with my trusty dremmel. I then removed a section of the hard disc bay where the fans where going.
The fans in place to give me an idea how much to remove from the hard disc bay.
Removing the section of the hard disc bay
And finally some shots of the bay thang back in place.
Hope you like the progress so far.
Project Liquid Bloo: Forwards and Backwards we go
2004-04-16
I had some forwards and some backwards movement on the project yesterday.
I bought a cheap drill that will take the arbour so I could do the holes I required.
I started off measuring and drilling some pilot holes , and then cut a hole through the perspex and the aluminium. Unfortunately I ballsed up in my calculations and put the holes too close together DOh!
I quickly knocked up another front panel this time with the holes in the correct place
I also knocked up a little grill surround for the back grill
So despite the mess up , I made forward progress.
Project Liquid Bloo: Wiring loom and front rings
2004-04-18
I’ve had some frustration over the last few days, First off I completed the wiring loom with the new connectors I ordered.
I intend to paint the white connector silver when I get time.
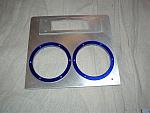
After this I attempted to make some rings of blue perspex to mount around the blowholes in the front panel.
This was alot harder than I imagined I tried 4 different methods before find one that would create perfect circles.
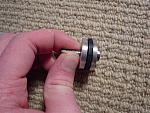
What I did was to cut out a rough circle 90mm in diameter, then drill a central hole. In the hole I mounted a nut and bolt and tightened it securely. I then stuck the bolt in a drill and spun the disc with the drill filling off as it spun. Its a very quick method of making circles.
After that I cut some 76mm holes out of the center with a holesaw. They need polishing on the edges but they are a lot better than I feared.
Project Liquid Bloo: Secret Discs and power switch
2004-04-19
Its been a busy day of filing with not a great deal of progress, I’ve put one of them together to give you an idea of the final look of the discs together. No clues as to what they are for tho hehe. The bolts just there to line them up.
I’m not sure whether I’m going to use this switch yet but I’ve wired it up in the normal pretty cabling
Project Liquid Bloo: Front fans in place
0000-00-00
Second quick update , I’ve drilled the bolt holes for the front fans.
Here’s them in the perspex
And a couple of final pictures with the front panel and bloo rings in place
Project Liquid Bloo: Perspex and puppies
2004-04-21
Another day another update, I’ve spent the last few days trying to tidy up the perspex bits I’ve already cut, I’ve got a couple of grits of sandpaper and some novus #1 and #2 out for polishing. I’ve not finished yet but the difference is noticable already.
Also I’ve order a very cheap zalman heatsink for the northbridge when it arrives. It comes in a nice bloo to match the perspex.
Also I started on a box to contain the fan control circuit I’ve made, the circuit and box arent finished yet but you get the idea.
Project Liquid Bloo: A couple more bits started and finished
2004-04-22
Another daily hupdate.
I’ve been doing a few minor bits of the project, firstly I’ve been finishing off the little circuit box. This now has a lid , and some cut outs for the inputs. The circuit still needs to be finished before I can put a tick by the fan box saying complete but its close.
I also polished up the perspex fan grill for the rear fan and did a test fit
And lastly I’ve started the bay unit that will hold the vfd graphic display I will be using
Project Liquid Bloo: Blooming plexi cracking
2004-04-27
Its been a nightmare day of perspex cracking on me . I’ve had to redo both the front rings as the first I ballesd up measure the drill points for the bolts and the second snapped while drilling. Mind you I have done them in half the time it took before so it wasnt all bad.
The back grill mount also snapped on me so that is being redone as well.
All part of the ups and downs I suppose grrr.
Anyway onto the pics first is of the slot for the optical drive being cut out of the front panels
Then the infamous rings of pain
And finally the redone ones that are the final article thank god. The protective coatin is still in place , but you get the idea from the older pics. The bolts look damn good but I may change them for countersunk ones I can’t decide hehe.
Project Liquid Bloo: Faceplate brushing
2004-05-08
I’ve been kind of distracted by a redo of an older project and some other real life stuff so I’ve not done much on this project yet. I’ve decided I’m not happy with the front panel so I will be using this one as a test piece with a final build of a new one running along side this. I took the time to practice my brushing technique, there are a few finger prints on it but these shots give you a real idea of how the final thing will look:
Project Liquid Bloo: Removing the Logo
2004-05-15
Its been a while since I’ve updated this log , because I’ve been working on another project. I have done a quick bit of work today , pictures of which you can see now. Its just me removing the logo from the shuttle faceplate.
Project Little Devil
Project Summary:
Having owned almost a dozen shuttles including the very first model, I’ve always been a fan of them, but I’ve never really done a full blown mod project based around one. This project will change that, having sourced a bare g2 style case I have set to work creating something that is a class above the normal shuttle.
Previous Page | Next Page
Page 1 | Page 2 | Page 3 | Page 4 | Page 5
Project Little Devil: First Update
2004-03-01
Its time for yet another Gordy modding project.
I’ve been a shuttle fan for some time now but I’ve yet to do a major modding job on one as I’ve not had the time or the inspiration till now. Having seen some amazing projects entered in a german shuttle modding contest I was very much enlightened on just how much was possible.
Anyway onto the project itself. I found a store that sells Shuttle SB61G2 cases with no motherboard inside. They come to around £45 delivered, they don’t pack them very well at all so I won’t recommend the store. The heat pipe was just left loose inside the case, needless to say the inside of the case was scratched and the heatpipe bent slightly. I wasn’t impressed.
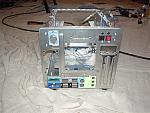
I took some pictures of the case when it arrived :
I also ordered one of the new Silent X shuttle psu’s as I had only heard good things about them.
Its slightly larger than the stock 200watt PSU but fits in most shuttles along with being a 250watt psu
While I was doing my last project I found that I really needed a tool to allow me to remove the pins from an atx connector for a psu. This is just a tool, unfortunately it costs a massive £25 !!
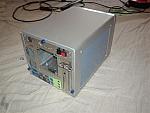
I took some nicer shots of the front of the case here
The first thing to do was to removed the nasty grill for the main case fan as it only blocks the air and creates extra noise. I used a dremel to remove the grill, tidying with a set of files.
Project Liquid Bloo: Making Some Progress
2004-03-05
I don’t want to reveal too much of my plans for this mod early on as it will spoil the fun. However you should be able to see something of what I have planned from this update. I’ve cut up a small section of aluminium so that I can mount a couple of 80mm fans. This was just a test piece to see what it looked like and how easy it was to make.
I also got some of the metal supplies I will be using in this project, this is 13swg aluminium sheet and a solid aluminium bar…
Project Liquid Bloo: Cutting cutting and more cutting
2004-03-13
Its been a lot of hard work over the last couple of days to get some work done on this project.
I’ve got blisters and nightmare hands after spending bloomin ages cutting 8 discs of the aluminium bar. For what these are for I will leave you to guess for now 😉 . They need a lot more work as they are only rough cuts and need filing down to size. I have some new files on their way as my existing ones are going blunt and I need very sharp ones for all this work.
On to the pictures
I’ve also got some small parts that I needed, first are some small hinges these are going to be too big, but I needed some for measuring up. If anyone knows a source of minuture hinges let me know. The other part are some small felt pads, no clues as to why I will need them yet.
Project Liquid Bloo: Wiring parts arrive
2004-03-30
Some of my parts have arrived from Kustom Pcs these are the bits for my psu wiring loom and some fan insulators to reduce the noise of fans. All the molex’s arrived along with some UV cable but I wasn’t happy with the colouring so I will be using some different wiring as I wont have any uv lighting sources within the case. I will swap the UV molexs for the stock bloo ones as they are a better match for the p4 and atx connectors. Big shout out to graeme from Kustom Pcs for helping me sort all this out.
Project Liquid Bloo: Power Supply Modding
2004-04-03
Its been a terrible couple of days, I had a massive flood in my flat due to a burst pipe. Its set me back a fair bit but I may get a workshop out of it so its not all bad .
The work I’ve done is to completely rewire my shuttle silentX power supply. I’ve removed all the connectors and replaced them with three bloo connectors.
1 ATX (mobo)
1 P4
1 molex
You’re probably thinking I’m mad how am I going to use just one molex. Well I’m not. I’m going to have a single removable wiring loom coming off this connector.
For the wiring I used this lovely silver speaker cabling which looks spangly.
I need to remove one last sticker off the power supply to get it clean. It has some small scratches that will need polishing out at some stage.
Thats for another day tho.
Onto the pictures:
The final atx pin was nearly the end of my finger. It put a cut down my nail and the top of my finger. Blasted thing grrr.
Project Liquid Bloo: Big load of updates for the Project
2004-04-11
Hi Folks, Another update. I’ve been working on lots of different parts of the project. First off I have received the Coolermaster Neon Fans in blue that I want to use for the project. I set upon them to re wire them so the cables were the same silver cabling used on the psu. I also rewired the circuit so that the led and fan circuit are separate.
This means that I can run the fans at any voltage without any problems.
Onto the pictures:
I also setup the rheostat and mounted into the shuttle case where the wireless network arial would go.
Next up I attacked the front panel so that the fans can be placed in the front panel.
This was done with a dremmel, onto the pictures:
Project Liquid Bloo: Front Panel work
2004-04-14
I’ve received some more supplies for the mod, mainly two huge sheets of blue plexi.
I set to work on the front panel modding, I’ve already cut a sheet of thick aluminium to size. I then cut a sheet of the plexi to size as well. Here’s some pictures of the work.
A quick picture of the cold cathodes I’m using for the project as well.
Previous Page | Next Page


