Nerf Stryfe Worker Flywheels and Wall hanging
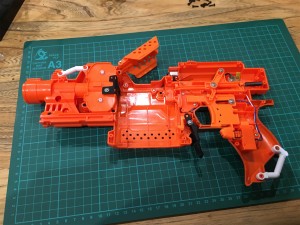
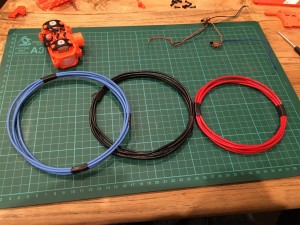
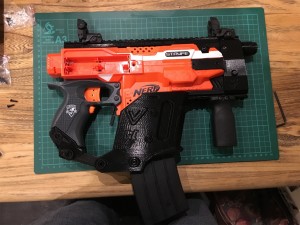
So I had a bit of a wait for more parts to arrive. The main ones were the rhino motors and worker flywheels. Once they were here I could take the Stryfe apart again and this time wire it properly. The silicon wire was so much easier to run round the blaster.
I got the rhino motors wired in and the worker flywheels fitted.
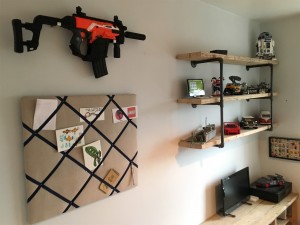
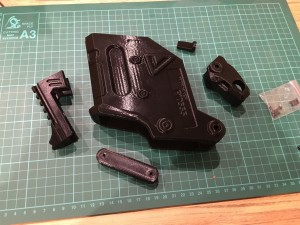
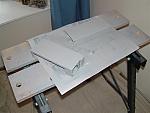
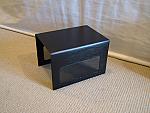
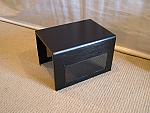
After that I needed to find a way of wall mounting this blaster for storage in my office. I looked around at lots of hooks and off the shelf items, but none were suitable. In the end I decided to make my own. Five minutes with a bending brake and saw and I had these:
I laid foam on the inside of them and fitted to the wall via screws. The blaster looks awesome up on my wall.
Once I’d completed this blaster I set to work on my kids one making some changes/improvements. I ended up with this result that they are delighted with.
I’ve got one more part arriving for my Stryfe that will see it completed. Next up I want to finish my Demolisher internal mods before starting on some Nerf painting projects.
Nerf Stryfe Mods
Whilst it’s cold wet and miserable out there, it’s been hard to get any work done on the motorbike. I’ve instead taken to modding Nerf guns.
I picked up a Nerf Stryfe after xmas as it seemed to be a great blaster for modding. There are so many choices for things to do to them and lots. It started with this post on reddit: Merry Kriss-mas. It’s the Kriss vector kit for the Stryfe. It looked awesome. I discovered the joy/pain of Taobao and trying to purchase items from there.
I started off with taking the Stryfe apart to remove the locks and do a rewire.
I realised as this was my first attempt, it was going to be tricky, but it wasn’t too bad. I made some mistakes and will be redoing this again when some more parts arrive.
Whilst I had the stryfe apart I fitted a new 3d printed magazine release catch designed by Gavinfuzzy on reddit. He very kindly shares the Stl files so that I could get it printed locally. As sadly the shipping for so such a small part was astronomical otherwise. It was my first bit of 3d printing and I discovered that there is a 3d printer manufacturer just down the road from me. (YAY!)
Next was to wait for more parts to arrive. The main parcel was from YOYbuy with the Kriss Vector parts. I also stuck some ebay orders in for Black banana magazines from Blasterparts.de as well as some motors from Blastersmiths (Also seemingly just down the road).
Finally the parcel from China appeared and after the painful Customs bill I had the parts in my grubby mitts.
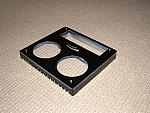
The F10555 parts are 3d printed and are excellent quality. I was very impressed with them. I picked up a few worker bits as well that I would need.
The first job was to fit the stock together. It is adjustable so I managed to find a good size for my build.
Next when ordering I made the first of my two mistakes. I had ordered a separate rail cover for the bottom of the Stryfe. This isn’t needed, but I tried it on to see how it fitted. I also fitted the main top rail. Both these went on really easily.
Next I ran into some issues fitting the magazine cover part. Basically the bottom rail cover was wrong. It had rails that were much larger than the ones on the Stryfe. Which is odd as the other rail mount fitted fine. Either way, I had to come up with a solution, so I took the dremel and cut off enough of the rail until the bottom rail fitted ok. A bit of a pig, but fine in the end.
Next I fitted the grip to the clip cover section. It’s all really well built and thought out so this went well. I could then fit the front cover on as well. This uses the existing nerf barrel connection and is very quick to fit. I put on the front grip and the flip up sights I bought. My second mistake was discovered it. The side inserts came with a single 10cm rail instead of two 5cm one’s so I’d have to order some replacements. I’m not sure if this was something I ordered wrong or was sent out wrong, but not to worry.
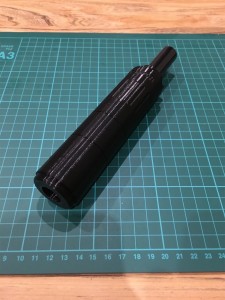
It’s starting to look really good now. I next needed to fit the barrel and silencer. I made another ordering mistake here and got the longer silencer. It’s a bit too long for my liking, but I will order a shorter one. Cutting the barrel was fairly simple but my advice is to make sure you measure properly and make sure the barrel is really fully in the silencer…. Not that I cut wrong of course (cough!). Good job there is a long section of it!
Finally all the pieces were in place, and I could fire it up.
Currently I’m running it with 2 imr’s and 2 dummies. It fires really well with loads of noise!
Jobs and parts left to fit are as follows:
Worker flywheels
Rhino Motors
Silicon Wiring
Side rails
Sling mount and sling
Sound deadening.
Poker II Keyboard
I bought it before xmas as my first mechanical keyboard. It was originally a German ISO keyboard Cherry Red. I used a UK ISO PBT keycap set from ducky as a start. I then added some PBT doubleshot keycaps from Massdrop.
Other additions are my lego keycap that I made, a red aluminium spacebar and newly arrived today was a Holyoops backspace key.
I want to get a silver aluminium case and red cable from Pexonpcs then it will be finished… maybe
A router to go with an Apple Airport Extreme
Up until last week, I have always had one model or other of a wireless netgear router. I’ve found the netgear routers work really well and are easy to manage. However with my purchase of a 11in Macbook Air, I needed someway of sharing files without my Air being at home all the time. I’ve used various NAS drives and even an HP Mediasmart server for this role, but I’ve never found something that fits my needs.
I’ve always looked at the Apple Airport Extremes as a nice choice, but the price has put me off in the past. However I bit the bullet on one to get the best Wifi speeds I could with the Air’s Wifi only specs. I thought I would try it out and try out sharing using it for a week and see how it went. I was most impressed. However it has one major downside. No integrated ADSL modem. I was using my existing Netgear router for that, but it seemed overkill. So I picked up a 2nd hand Netgear DG834 wired router off ebay. I had it in my mind that I would use this in addition to the Airport Extreme.
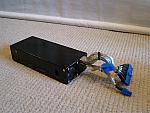
Whilst I was waiting on the router to arrive, I got to thinking that it would be nice to have some that matched my Airport Extreme or at least didn’t take up more space. I hit upon an idea, what if I put the routers circuit board inside a matching hard drive enclousure?
I’ve had an old Lacie Mac Mini Companion drive in the loft for a while and thought it may work.
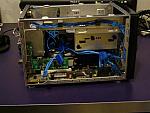
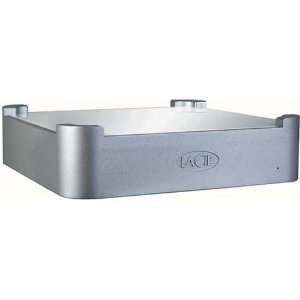 After taking apart the router and the lacie mini I tried for the first time to fit the circuit board of the DG834 into the space. It fitted to the milimeter. I couldn’t believe my luck.
I then took some plastic standoffs and glued them in place using hot glue. These would hold the router circuit in place. I next needed to expand the holes at the back of the enclosure to allow the cables to exit the router.
It is a bit rough and ready, but does the trick. It won’t be seen from the front anyway. I then built the enclosure back together.
With that done it was time to put the router in place and see how it worked. You can see in the above shot, that I put some extra spacers above the board. They give the board more support when the lid is in place.
It sits underneath the Airport extreme very nicely. It required a bit of tweaking of cables, but it now stays in position perfectly. The hard drive next to it is the one I store all my films/music/etc on. The added bonus of doing this is that the Airport extreme and Netgear DG834 seem to run much cooler. They are shut in the cupboard 24/7 with no issues. So finally my fast silent way of sharing files is done.
Project Silicon Page 3
Project Summary:
Inspired by Mashies conversion of a Silicon Graphics O2 case I sourced a similar case for a project of my own. These are very cool little cases but its a tight squeeze to fit a MATX sized motherboard inside. There have been three different versions of this project as I wasn’t happy with the first two. After nearly two years in the making its now finished. The specs of the final system is a Pentium IV 2.26ghz cpu, 512mb of Corsair Ram, 160GB Seagate HDD, Sony DVD writer and a Sapphire 9600XT Ultimate.
Previous Page | Next Page
Project Silicon: Version Number 3
2005-03-24
Ok here is a mega post bump hehe, I’ve finally found the time for modding. I’ve kept Project silicon on hold for ages now and it needs to be finished. So I’ve got my backside in gear and done some new work on this project.
I wasn’t happy with the previous riveted chassis now that I have a bending brake as I could make a new chassis that was much cleaner with one main sheet of aluminium. I will use my new nutsert tool to attach threads for attaching the other pieces together.
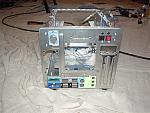
Here is the main section of the chassis I’ve cut and bent into shape.
The chassis is held in place with 4 screws on the bottom.
The motherboard just slides into the chassis and is held in with plastic standoffs as before.
With this new re jig I’ve decided to mount the hard disc on the bottom of the chassis this was where the psu went in the old design which blocked two pci slots, the hard disc just blocks one and I seeing as I dont need all three its no problem. I may change it to the top of the chassis at a later date though with moving the psu where I plan this would be possible.
For those interested in the nutset tool here is the kit/the nuts themselves and how they look in place.
I’ve just sleeved and redid the cold cathodes for this project with the help of my girlfriend I hate sleeving its quite useful to have a helping hand.
I’ve also taken a quick couple of shots of the heatsink, its a swiftech heatsink with a noiseblocker fan and a lovely laser cut fan grill.
I’ve sleeved the two noiseblocker fan, I’m using one 80mm on the heatsink and a 92mm for case cooling.
I’ve started work on the back panel. Its going to have a single 92mm fan mounted in place. After a bit of a scary moment with my holesaw I had a nice blow hole in the back panel.
I didnt get a chance to do much modding today but I managed to mount the rear fan. I’m using some nice allen key m4 bolts. I will also be mounting a “tenderfoot” on the back of the fan to give it a nice look. Just a couple of pictures for you all to see.
I’ve spent my time over the last few days working on the back panel. I’ve pretty much finished it now. I’ve also fitted the optical drive to the top of the chassis.
The first pictures are of the optical drive in place.
And these pics are of the back panel being built and in place.
Another daily update, this time its the power supply that has got sleeved. I’ve changed the connectors for black of blue versions and used the same sleeveing used elsewhere in the project.
I hate sleeving things and this took ages but I’m very happy with the results. The white connector is for the power plug loom so I know which it is and don’t blow the thing up hehe. I’ve also brushed the psu and clear coated it.
The sata connector is right pain to fit I broke one in the process of fitting it.
A quick update from today, I’ve done a few little jobs but the main two were sleeving the power cable for the psu and mounting the psu onto the supporting strut.
I’m coming to the end of the project now, I’ve one drill hole left to do and then its onto the installations of all the parts.
Over the last few days I have installed the cpu and heatsink into the motherboard to get it ready for installation.
I’ve also installed the switches and leds, I used them in the projects last iteration and they are still good so I slung them into place.
I have also brushed the outside of all the panels to give a good final look, its a bit hard to shoot the brushing, these pics are poor it looks much better in the flesh.
Finally I wired up a rheostat to control the two fan’s speed and again sleeved it in the blue sleeving.
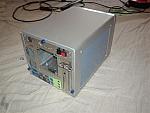
Well almost two years in the making Project Silicon is finally finish for the the 3rd and FINAL time hehe.
I encountered a few problems on the way to the final installation but I have over come those problems now.
One of the last few jobs was to install the rheostat into the rear panel, I’ve used a blue aluminium knob on the rheobus to complete the blue theme.
I then started to install all the parts into the chassis, a few problems cropped up first off the power cable to the sata hard drive wouldn’t fit so I had to redo the loom for that connector. Second the power connector for the optical drive was wired incorrectly so I sorted that problem out. I had a problem with the ide cable , it was for two devices so I just cut off the extra one to tidy things up. It was all downhill from there thankfully. One problem I also encountered is that I over estimated how much cable I really needed so many of the cables are a wee bit too long which is a bit annoying but can be worked around.
I decided to leave the side bit open to allow airflow to the psu it makes sure the system doesn’t overheat.
A quick couple of pics mid installation:
Well here is the final "glamour" shots of the complete project silicon.
Thats just the case on its own, I’ve tied it up with a hercules 17in tft and microsoft bluetooth keyboard and mouse setup to finish it off. Its going to be my girlfriends rig and she likes it very much.
Here’s some more shots with everything turn on and hooked up, you can see the twin cathodes giving off a nice bloo glow.
Previous Page | Next Page
Project Silicon Page 2
Project Summary:
Inspired by Mashies conversion of a Silicon Graphics O2 case I sourced a similar case for a project of my own. These are very cool little cases but its a tight squeeze to fit a MATX sized motherboard inside. There have been three different versions of this project as I wasn’t happy with the first two. After nearly two years in the making its now finished. The specs of the final system is a Pentium IV 2.26ghz cpu, 512mb of Corsair Ram, 160GB Seagate HDD, Sony DVD writer and a Sapphire 9600XT Ultimate.
Project Silicon: Version Number 2
2004-06-05
Some of you have been following my work of late will have realised I’ve been working on Project Liquid Bloo mainly of late.
I have got to the stage of the project where I have moved the cpu ram etc over from my old SGI mod project Silicon. This forced me to take apart Project Silicon and give me some fresh ideas on the project. I decided I didn’t like the original inner case and that I could do things much better.
So I decided to make a new inner chassis. I intend to use aluminium sheet with L shape aluminium on the edges fixed together with rivets. I had a shock this afternoon after coming back from the store with the parts to see Mashie had decided to use the same materials on his SGI case remake as well. So a big sorry to mashie for picking the same materials, I know he will create something very different to mine in the end.
I tried to keep the structure as simple as possible with as few parts as I could.
The chassis was brushed and painted with clear coated to protect the surface, I created two 80mm blow holes at the rear to keep the case nice a cold.
I brushed the power supply and combo drive to match the chassis.
I was trying to get this version ready for a tv show, but during the final build phase an error I made in the wiring blew both the combo drive and my hard disc. I never got to finish this version properly.
The film shoot was fun , big hellos to mashie and macroman who joined my on the day. It was a long but fruitful day. No pics of my mods but heres us on the day.
Here’s mashies work the pics dont do them justice:
Macroman didnt bring any of his projects unfortunately but here’s his rig he was demoing for the program.
Macros nice collection of weapons hehe.
And some final mug shots.
Macro and myself:
Myself , Macro , Aleks (the nice presenter) and Mashie:
I totally failed to take any pictures of the car pc I took along what a tool I am 😀
Project Silicon Page 1
Project Summary:
Inspired by Mashies conversion of a Silicon Graphics O2 case I sourced a similar case for a project of my own. These are very cool little cases but its a tight squeeze to fit a MATX sized motherboard inside. There have been three different versions of this project as I wasn’t happy with the first two. After nearly two years in the making its now finished. The specs of the final system is a Pentium IV 2.26ghz cpu, 512mb of Corsair Ram, 160GB Seagate HDD, Sony DVD writer and a Sapphire 9600XT Ultimate.
Previous Page | Next Page
Project Silicon: Version Number 1
2003-11-10
Well now that Project Bad Apple is complete its time to start working on my next project.
I was disappointed that the apple case was a bit too big for me as I’ve got used to having a small shuttle sized pooter, so I wanted my next project to be something smaller but still have a good sized mobo.
I remembered mashie’s entry to this years CPL Project Oenone and had a look at the size and it was perfect. I managed to source a Silicon Graphics O2 via ebay but not through it. It cost £122 with scsi cdrom and psu both of which will be ditched obviously. ( Project Oenone : www.mashie.org )
Clearly this isn’t the first time some1 has done this mod and I have to give big credit to mashie for the idea in the first place. I will be trying my hardest to make it different where possible. I have a long term idea that would be very different but cost could be very preventative.
I only got the case this morning and here it is:
I then set about taking it apart it took some time to work out how exactly to do this but I got there in the end.
First thing to do now was to give it a blooming good scrub so I took the plastic parts into the bathroom to clean the dust off.
Before:
After:
This is going to be a very tight fit to get the board and everything in place eeek.
And finally here is a shot with project bad apple in the background to give u and idea of the scale.
This project went through many different variations the first one used rough aluminium bends to create the inner chassis. The psu and hdd drive were mounted in a section behind the motherboard.
All the cabling was sleeved using chrome/silver braiding, and I intended on using a matrix orbital mx2 lcd, this would require me to split the lcd into its two sections. Unfortunately when doing this I killed the lcd sniff. I used some custom made fan grills made by kong on bit-tech.net and with the bit-tech logo.
By the end there was quite a few sections of aluminium that made up the chassis. I made some special thumb scews to hold the back panel in place. A guide to making them can be found on the modding page.
And the finished article for this variation is shown below.
Previous Page | Next Page
Cubit 3 and Cubit 5 Cases
I’ve recently managed to source both a Cubit 3 and Cubit 5 case from ebay(hoojum), so I thought I would post these of the black version and of the far smaller cubit 3.
Hoojum Cubit 3:
Its a tiny but very heavy and cool looking mini-itx case. It looks flipping amazing in the flesh. Installation isn’t as easy as say a full atx case but its not bad. I had a few teething problems with mine but I think this is due to it not being an off the shelf hoojum but a demo machine. I had to redrill the hdd mounts for the 3.5inch drive I was using and the front circuit board needed a wiggle to get it into place
It can take all kinds of mini-itx boards/ a slimline optical drive and either a 2.5in or 3.5in hard disc drive (You could fit two in with some modding of the shelving system.
Everything is built on little shelves then slide into place, cabling is a bit of a problem but with some planning it can all be squeezed into place.
Having had a play with this system I will shortly be using it as the basis of my new modding project. It will feature watercooling and a very powerful but tiny system. Keep your eyes peeled for more news 😉
Hoojum Cubit 5:
The cubit 5 is a replacement case for pretty much any shuttle system. It had two front plate designs to cover the differing designs shuttle use.
Like the smaller Cubit 3 case is very heavy but very well built. Its far better than the standard shuttle cases.
I’ve transferred my SB61g2 based system over to the cubit 5, it has a AT x800xt , p4 3Ghz 2GB of Corsair DDR XMS ram, Seagate 200Gb sata HDD and a Panasonic DVD Writer (Slimline)
The build process for the cubit 5 is similar to the cubit 3 bit is a bit more fiddly and fitting all the shelves in is a bit of a battle. Again the case looks great but I had a few teething problems, firstly the IR cover was too big and had to be filed down to fit, secondly getting the psu into place was a pain.
Personally I think they should ditch the card reader as it just spoils the lines but other than that its a good design.
There is plenty of room inside more than a shuttles I would say, I plan on watercooling this system soon and there appears to be enough room to have it all internally.
I had a few issues with cooling but it was mainly down to speed fan not working. Now that I’ve sorted that out it works much better and I’ve had no crashes.
Pictures of them side by side:
To give you a good comparison of the cases differing sizes I’ve take some pictures of them to show you.
Project Little Devil Page 5
Project Summary:
Having owned almost a dozen shuttles including the very first model, I’ve always been a fan of them, but I’ve never really done a full blown mod project based around one. This project will change that, having sourced a bare g2 style case I have set to work creating something that is a class above the normal shuttle.
Previous page | Next page
Page 1 | Page 2 | Page 3 | Page 4 | Page 5
Project Little Devil: Woooot parcel not lost
2004-12-21
Well things just got wierd!
Had a knock at the door earlier and I assumed it was the courier coming to deliver my bits ordered for my new project. It was a courier box he was carrying a box I recognised!
And lo it was the box I sent off to the USA many moons ago, the reason its been returned was stated as ” Not deliverable as addressed, Unable to forward”
God knows what happened I will have to speak to the people at the other end and double check the address.
At least I dont have to redo everything!
Project Little Devil: (Major Update)
2005-04-25
Ok its time for a major update after the long delays, I’m hideously over my hosting limit by 2gig whoops but what the hey hehe.
I’ve got back to work on this project over the last week spray painting certain parts of the project, I had originally intended to get the parts airbrushed in the USA at smooth creations but after a long round trip the parts ended up back in the uk without any paint one them. I could face resending them so decided to do the painting myself and to not do the airbrushing that I originally intended.
First to get the painting was the case cover, its had 3 coats of primer and 3 of black, its not finished yet but here are the pics of it being modded. I’m not 100% sure how and what I’m going to do with it after the black. I’ve a few ideas that myself and my girlfriend are going to have a ideas session with to see what would look best
While I was looking at the psu I decided it was quite scratched from being moved so much and painting it black would be a good idea. So I took the electrics out of the casing and gave the casing the same treatment as the case cover. Its come out quiet nicely.
Next on the list of jobs was to spray the front panels, this took a fair while as it had three seperate parts to paint.
I then set about attaching the front panels into place.
I then put the drive cover/lcd holder in place to see how it would look in the end.
I hope to finish the case cover over the next week when I make my mind up hehe. I’ve got to design and build the fan control/led circuit as the originals I wasn’t happy with. I have a small aluminium box that will hold the circuits.
Quick update
2005-05-21
I’ve not had a chance to do much modding over the last few weeks and my new powerbook has taken up a lot of my playing time hehe. What I have done on the project has been a disaster.
First off I masked off the shell to do some colouring and when I pulled of the tape it took some of the black with it in certain places. I tried sanding down and starting again but I wasnt happy with the results and the same thing happened again 🙁
You can see the damage round the front in this image.
So I decided to cut my losses and get hold of a meshed cover instead as I have one on my main rig and they look excellent. It will show off more of the insides of the case as well.
It looks far better than painting would and matches the paint work on the rest of the outside. I’ve also redone the front pieces to get a better finish and to stop some of the chipping. I’m not happy with them yet so no pics but they are on the way to being done.
The plastic surround is another problem area I cant get it done to my satisfaction yet, and I may get a black surround if I can find one at a sensible price. That way there won’t be any chipping on that as it will get the most of the abuse when carrying it around.
Project Little Devil: Nearing Completion
2005-07-09
Ok I’m on the homeward leg now of this project. It should be up and running in the next couple of days and complete very soon.
Since I last updated the log , I’ve redone the fan control and led power circuit board. I’ve made it into a single small board and mounted it into a small aluminium box. I’ve made up a wiring loom for all the power requirements. Its made in matching blue cable as used elsewhere in the mod. I seemed to have misplaced the pictures of these items I will add them later if I can find them.
Over the last couple of days I’ve been gradually been building the machine back up. I’ve put the motherboard back in and fixed the controller circuit and cold cathode inverter into the spare hdd bay. I’ve reattached the modded power supply and attached the new wiring loom. I’ve fixed the rheostat into its position at the back of the case.
I’ve sleeved a new pair of 4in cathodes for the project to match the blue theme:
Here’s some pics of it being built up:
I will be transferring the components over from my main rig to complete the system, its going to be the following spec
Pentium 4 2.26ghz (To be replaced soon with a 3ghz chip)
2x 512mb Corsair XMS PC3200 DDR RAM
200GB Seagate barracuda hdd
Sony DVD Writer (SATA connected via convertor board)
Sapphire X800 XT Graphics Card
Shuttle SB61G2 motherboard with a zalman northbridge heatsink
It’s replacing my current AMD 64 rig so needs to be fairly quick.
Project Little Devil: Nearing the end
2005-08-17
Oh what a nightmare the last two days have been and its too hot for stress, its about 35degrees in my home office thanks to all the pcs. Little devil has been raising the temperature through other means though.
I will start with the good news; which is I’m using Little Devil to type this post so its now up and running. Its not complete yet, I need a new rheostat knob to match the black theme and the lcd isn’t in place yet due to problems I will describe below.
Onto the bad news; Getting Little Devil has been a complete nightmare, it took an entire day to get it up and running at the cost of one 200gb hard disc and the onboard sound it seems.
I started off by doing a test boot with just ram/cpu/mobo and it worked fine, I gradually built up to the full system and it just wouldnt boot up , I thought at first that it was a dead power swithc but it was my nice 200gb hard disc 🙁 Whenever it was plugged in the system wouldn’t boot. I replaced it temporarily with a 160gb drive from a client’s new server I was building and that sorted the problem with the system not booting but obviously I lost my hard disc. I’ve ordered another one now but it was a cost I could really have done without at the moment.
I then reinstalled windows to find that for some reason the working sound card onboard has stopped working, its fine in bios and in the control panel but won’t output any sound , I’ve tried lots of different drivers and checked all the settings but I’ve had no luck sorting it. I’ve therefore had to order a pci sound card to get sound which means the usb card I had in before will have to be removed. This leads to an issue with the cabling for the lcd, I was intending to use the internal usb port on the pci card but I can’t now. I will have to create a special cable instead. I’ve not had a chance to do that yet.
Another job yet to do is to mount the cathodes as I haven’t decided where they would best fit yet.
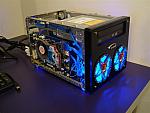
I took some pictures of the build and testing process along with some shots to give you an idea of the current setup. The blue front fans behind the grills are a great success as are the led feet, though for some reason the front right one is slightly dimmer for some reason.
Onto the pictures, first half build but powered up for the first time.
I then put the gfx and optical drives in, the wiring is a bit messy at the moment as I was just getting everything working first.
Then some other shots to give you a taster of the final look.
Project Little Devil: Complete
2005-08-19
Ok I’ve finally found time after finishing Project Mac Cube to finsh this project. There wasnt much left to do the main issue was the mounting of the lcd to the optical drive. I also had to replace the cpu and ram (God damn bf2 is resource hungry hehe).
I went from the following: Pentium 4 2.26ghz (Oc’d 2.54ghz), 2x 512mb Corsair XMS DDR, Seagate barracuda 250gb sata drive, Sony Dual Layer DVD Writer, ATI X800XT (oc’d beyond PE levels).
To the following: I went from the following: Pentium 4 3.0ghz (Oc’d 3.5ghz), 2x 1GB Corsair XMS DDR, Seagate barracuda 250gb sata drive, Sony Dual Layer DVD Writer, ATI X800XT (oc’d beyond PE levels).
All because I was getting bad issues in bf2 , curse EA !
Anyway back to the modding, the main thing that was holding me back installing the LCD was the cabling. I wanted to use an internal cable with nothing sticking out the back. I was going to use the existing internal matrix orbital cable but the back plate I was using to mount the lcd blocked me from doing this. So I bought an normal USB , and frankenstien’d them together to get the cable I wanted.
After making the cable up and doing the upgrade I set about installing the lcd drive. It wasnt as easy as I wanted , and I had to change the design of the back plate but once I had done that it was plain sailing. The cable is firm enough that when the drive returns it forces the cable back in the case. It works great and I’m very happy with it. I’d forgotten just how good the combination of a matrix orbital lcd and LCDC is!
I’ve taken some shots and a couple of video’s of the final finished project for you all to look at.
Videos : I took three vids for you to have a look at they are of the lcd in action along with the ejecting cd drive. The led fans at the front are dimmed slightly to allow clearer view of the lcd in the pictures (Its not a problem in real life just my camera.)
Previous page | Next page
Project Little Devil Page 4
Project Summary:
Having owned almost a dozen shuttles including the very first model, I’ve always been a fan of them, but I’ve never really done a full blown mod project based around one. This project will change that, having sourced a bare g2 style case I have set to work creating something that is a class above the normal shuttle.
Page 1 | Page 2 | Page 3 | Page 4 | Page 5
Project Little Devil: Fan control rheostat mounted
2004-08-08
Well I’ve finished the little trick I had planned to cover the whole. What I did was to create two peices of perspex to allow me to mount and cover a rheostat which will control the two from fans.
The protective covers for the perspex are still in place but you should get the idea . The rheostat in the pics is dead as a dodo so I will be using a different one in the final setup. It will have blue wiring like all the other wires.
Two shots of the perspex:
Two shots of the perspex with the rheostat in place:
Three shots of the knob in place, I will probably use a black version of this knob in the final case though:
And a quick shot from the inside of the case:
Project Little Devil: Face plate mounted
2004-08-09
I’ve made some real progress today, first off my new rheostats arrived and I wired the single one up I require to control the front fans. The mounting is slightly larger than for the old one so I will have to re drill the mounting plate
After that I tried to mount up the fans onto the face plate and fix them into place. I quickly realised the fans hit the case in the bottom corners. I removed one of the mounting points on each fan and trimmed the chassis a bit more to make it fit. After that I thought about how to hold it all in place. I planned on using the existing screwing points but these were in some unknown imperial size. So I decided to drill through them and using a long bolt with a nut hidden behind. This meant I could do a proper test fit. Everything fits perfectly. These pics will give you an idea of the final look but there are some major changes to the look to come 😉
Some more pics with the cover on.
Project Little Devil: Face plate spray painting
2004-08-10
I’ve been working on the front panel today to get it ready for its trip 😉
The spare test face plate got a black spray paint job to see how it would look. Even with a quick and rough spray job it looks ace .
Back to the original faceplate , I’ve been working on the cd bay cover , I have more work on this still to do later
Project Little Devil: LCD mounting
2004-08-11
Another update, this time I’ve been working on the mounting for the LCD I am going to be using. It is made up of 3 plates , the first is the outer aluminium bay plate cover behind which is a perspex holder for the lcd itself. This means I only need to use two visible bolts in the whole lcd holder. The third plate is a back plate which will be bolted directly onto the drive itself.
The frontmost aluminium plate still needs to have its screen area cut out which will be one of my tasks for later.
First off heres some pictures of the plates being made
Here’s the final structure of the mounting bracket
Heres a quick shot to show you the scale of it when it is attached to the optical drive
And finally two shots comparing it to an official Matrix orbital bracket. The lcd in the bracket is an MX2 lcd which I will be using in the project , the other lcd is a none working one from another project. It just stops me from killing a perfectly good lcd.
Project Little Devil: Shuttle Logo Added
2004-08-12
Ok some more work on this project to give you lucky folks.
First off I had to cut out a slot for the lcd in the front bay plate.
After that I had played with the logo from a shuttle face plate , I cut off the end of a bolt and mounted the thread into a small hole in the back of the logo. I then glued it into place.
I did a test fit with my spare face plate and it works a treat.
I had a minor setup back on the face plate , the perspex piece has cracked near one of the holes for mounting my devil fan grills 🙁 However its not the end of the world and the solution is quite simple and would have been necessary anyway. More on that later.
Here is a quick final shot of the face plate with all its holes drilled.
Project Little Devil: A set back
2004-11-29
Hi All,
Its been a while since I did and update, there are a few reasons for this, firstly I’ve been snowed under with real life and work stuff so haven’t had a chance to do any modding. Add to this the fact I’ve lost my workshop area for a couple of months and I’ve only just got it back. As you can imagine I’ve been frustrated hehe.
Unfortunately there is only bad news to report on this project, Royal mail have lost several items that I have made so far including the shuttle case cover, aluminium faceplates and plastic face plate. These will have to be re-sourced and remade which is a real pain in the backside.
I’ve got to put a claim into royal mail for them but I doubt I will get all that they are worth and they say it will be a few months till I see a penny 🙁
While I’m waiting on this problem to be over come I will be working on a different project which I will post shortly…


